Everyone has their own idea of what their little slice of Heaven looks like. Mine has always been a place near the beach. I love to walk and the beach inspires me. My hubby and I purchased a 1961 brick bungalow less than a half mile from the the beach in Myrtle Beach. I'm proud of what we have accomplished in our short here time here with our own hands. There is still a lot we would like to do so stay tuned for additional adventures!
I also plan to add a page for a complete gut job and renovation we did on a single-wide mobile home we bought, fixed up and sold prior to this home. That was some backbreaking fun but it turned out fabulous. And, then maybe a few other updates we've done along the way in the last almost 34 years. I may have to start scanning photos taken prior to the digital age.
This is how my little beach cottage appears today...
And this is what we had started with...
We started by removing that odd deck from the front, added some landscaping, a gravel driveway, shutters and new windows....
Much better!
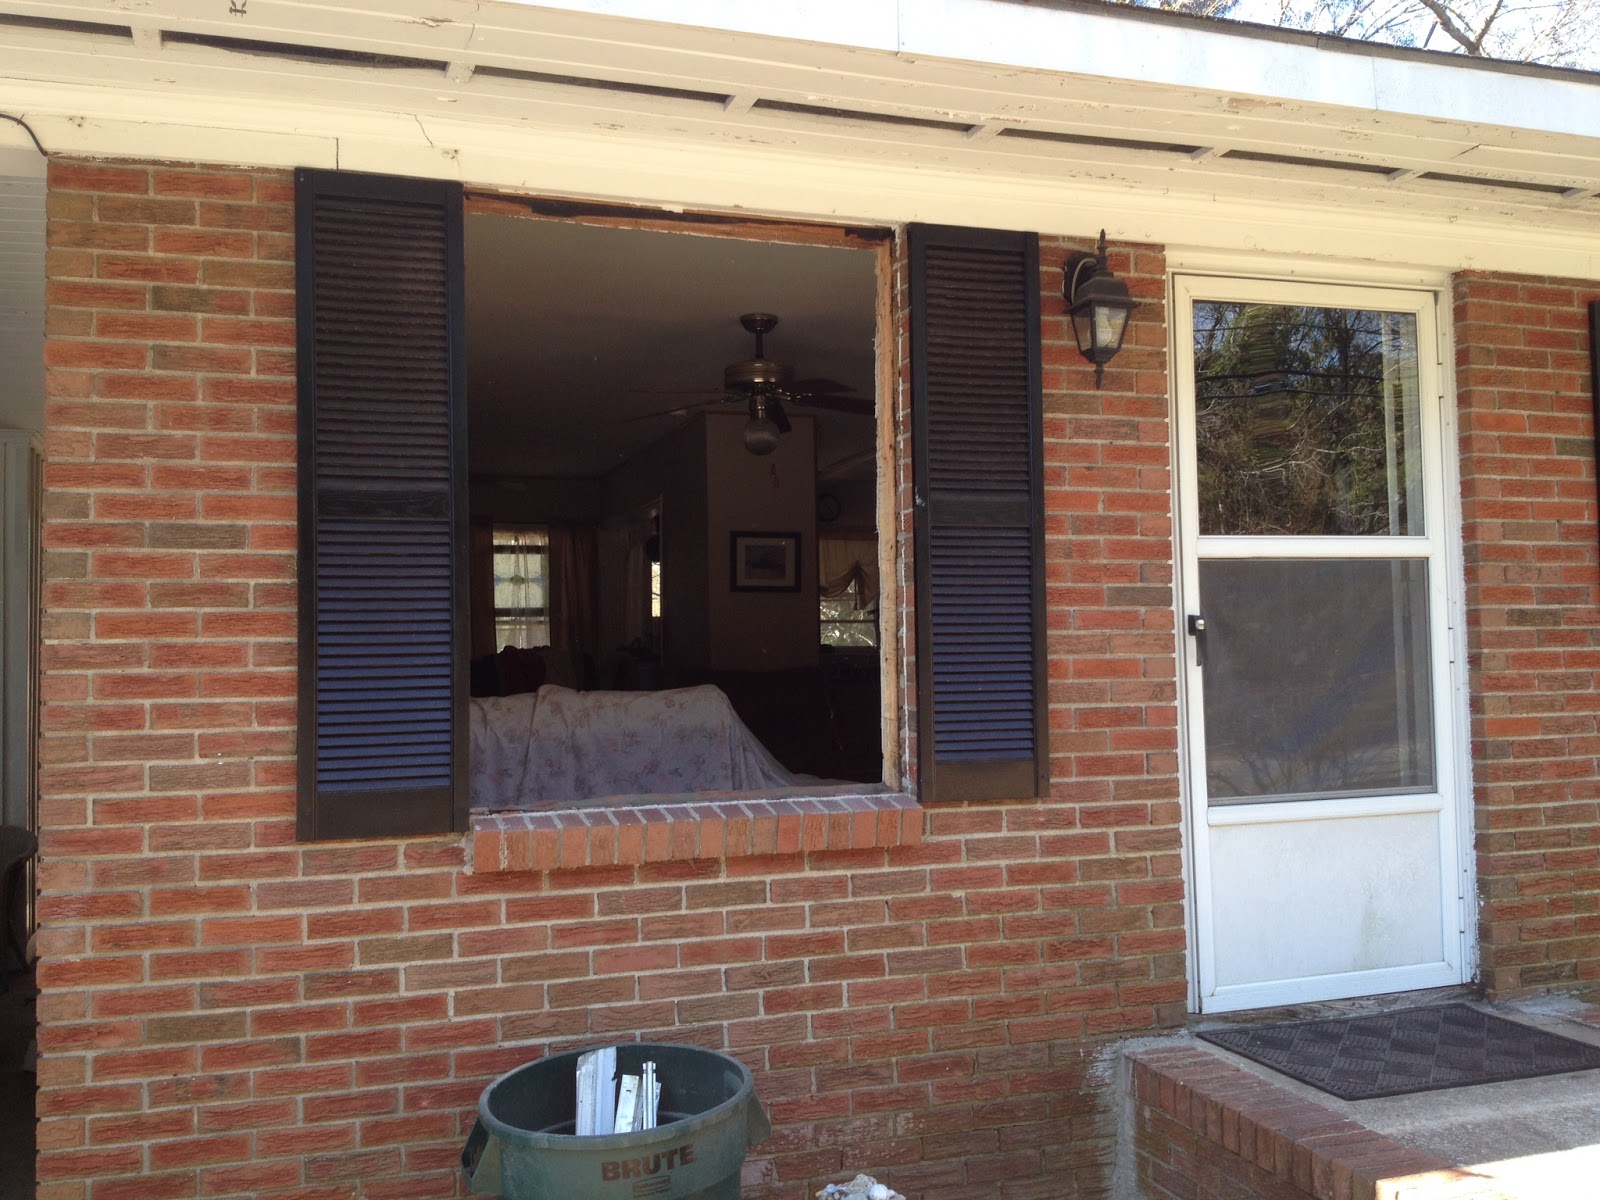
On to the backyard. This is what we started with...
That plywood board belongs to the only bathroom window at the time...more on that later....

The patio "pavers" are actually free (yes free) broken concrete slab from a paving/patio company in the area. We first used sand between them but soon realized the chair legs liked to fall through the cracks. We later used concrete between them. They are much better with the concrete! We still have work to to do. Hubby would like a rear porch. The cats would like that too! Our Marine Corps Combat Veteran son was a HUGE help in digging and laying the pavers. Let me assure you that it is back breaking work!!! I started the project and was so very thankful for their help. We also added the fire-pit, built the swing and gates with wood left over from removing the front deck, built the bench and added the front garden "dock posts" from a massive clothesline hubby chainsawed down in the back yard that was made of telephone poles (Really!). Finally we finished cladding the shed with vinyl siding we found on the side of the road (yes we did!), and outlined two large triangular flower beds with rocks from the beach (thanks honey)! We also power washed and painted all the wood on the house, carport and storage building with the help of our youngest son.


Until we replace the board with the glass blocks we have planned I did a little painting on the plywood that covers the bathroom window opening...
Okay...the outside is functional, for now. Let's move on to the inside. We started out with grandma's kitchen, complete with white speckled counters and a place to put our washer. The dryer was meant to be in the outside carport storage building. We moved the appliances around a bit for a new layout and turned the coat closet into a washer/dryer closet for a set of small stack-able set. Hubby still wants something different but I'm fine with it (he washes the clothes anyway). Our kitchen was done in two stages. First stage was my quick "I need to update this mess so I can cook in it until I can do the complete renovation" update.
Grandma's kitchen...
In this initial transformation I bought some inexpensive self-stick tile, Hubby modified the cabinets over the "washer" area so the refrigerator would fit. We shoved the stove down where the frig was, built an open shelving unit to expand the counter space by the stove and moved the refrigerator to its new home. I did a faux paint job on grandma's counters. Because the dining room was dark and isolated from the kitchen we decided to remove part of the wall between the kitchen and dining. What a great idea that was! So much more light and the kitchen feels more a part of the dining/living area now.

I did the faux marble paint job with a can of rustoleum white paint and a can of rustoleum black paint. I painted the counters first white then a light splotchy coat of gray (mixed some white and black in a cup for the gray) then sponged on black to create the marble effect. I then did three (3) coats of clear varnish for durability. They definitely updated the kitchen until we got around to the new counters. More on that later! Note the modified cabinets around the frig. Hubs did a great job cutting the cabinets.
Next we built the new open shelving to enlarge our counter space next to the stove.
And then opened up the wall...
He makes it look so easy...
It was finally cookable...for a few months anyway.
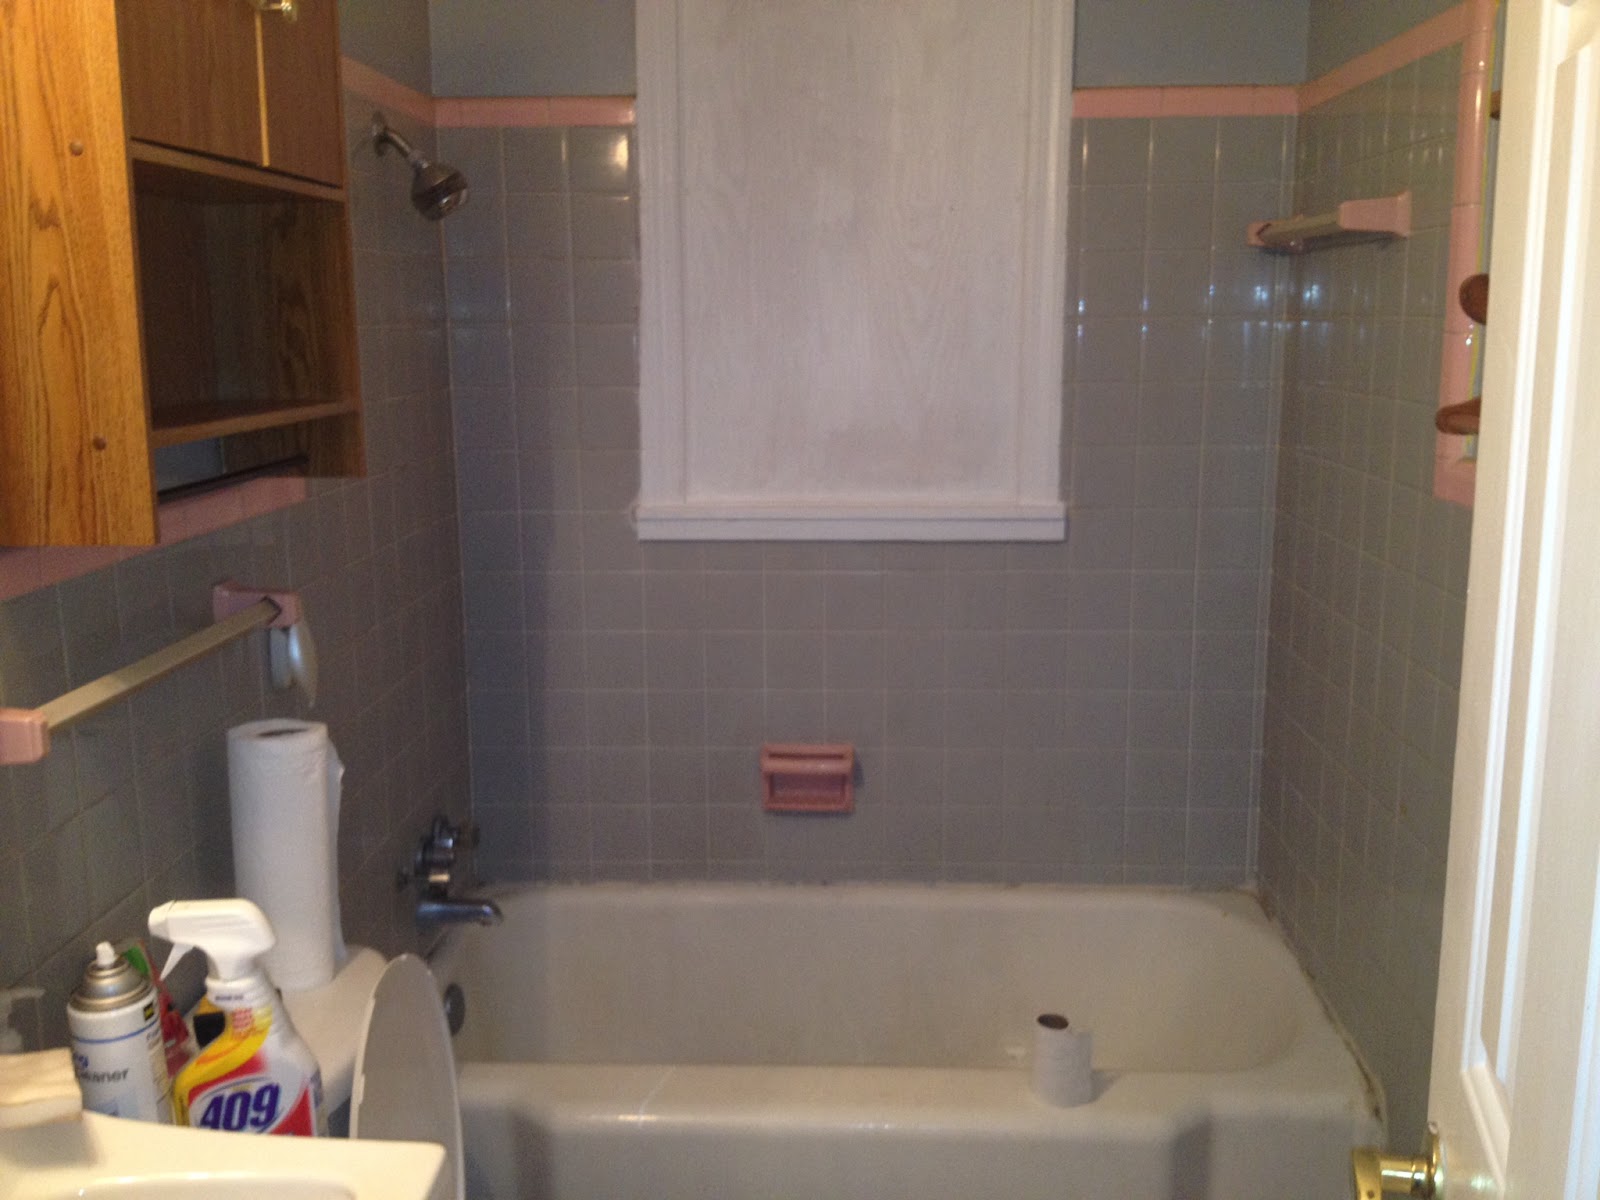
Next...the horrible bathroom! I actually don't dislike the gray tile and I loved the size of the old steel tub, however it had seen better days for sure...
Not to mention the walls were painted a dark dingy gray...
And the sink had been modified instead of replaced!
So...I started by refinishing the tub with one of those kits from Home Depot made to do just that. For the record, I do plan on having it done professionally eventually. It does not last forever. It's been two plus years and it needs to be touched up for sure. However, it still looks MUCH better than when we moved in. I didn't even want to step in it then.
Before...
After...
We then replaced the sink, I applied self stick tile to the stained floor, painted the walls bright white, replaced the square shelves behind the door that didn't allow it to open fully and replaced them with corner shelving, We eventually painted the new cabinet to the sink as well as the medicine cabinet (replaced the lighting) and over the toilet cabinet to match. Oh yeah...and I painted the lovely pink border tile and soap/toothbrush/TP holders white.
Before the paint job...
After the paint job...I still have some plans for this bathroom so stay tuned!
Almost forgot to show what I did as a quick fix for the plywood bathroom window on the inside until we replace it with glass block. It is a little better to look at while you shower and the glass block is our next project.
And, so...
Even with the opening to the kitchen the dining room was still a little dark. I saw a tutorial on making your own board and batten wall treatment using trim and paint on your walls. (You really have to love Pinterest). So, I headed to Home Depot and bought some really cheap wood strips. They were like 98 cents each! Really! Then I came up with the spacing I wanted, glued and nailed and painted. I think it turned out pretty good. I think I want to add another piece of trim to the tops just to beef it up a little.


Soooooo.....the quick update on the kitchen didn't satisfy me for very long. I needed to finish the kitchen. We purchased two lower double kitchen cabinets from a kitchen remodeling firm in the area for $160 (for both!) and I set out to make the upper cabinets mimic the new lower cabinets by adding trim, painting all of them the same color and adding knobs. We also replaced the microwave we had on a shelf over the stove with a a built-in microwave along with an unfinished cabinet over it from Home Depot. It left a little weird spot next to the wall opening but I found some 1x's in the shed that I was able to use to make some cute little corner shelves that fit just right. We also built our own wooden counter tops with pine 2x6's. I am so pleased with how it all turned out and we didn't spend more than six hundred on the whole redo!
Remember the before?
This is the after!
Some photos of the renovation itself.... We will start with the cabinets. We bought two regular under counter cabinets because that's what they had. One needed to go under the sink so I removed the drawers from that one and decided to use them as pull out drawers on the bottom on the other. Worked out well!
Then we added the countertop. Hubby did some fancy cutting for me :-) I also added the trim to the upper cabinets and the ones on the other side that we weren't replacing. Along with paint swatches that kept me up at night trying to figure out which one I wanted.
Upper cabinets being painted along with lowers to match...staining of counters in process...
Built-in microwave and cabinet installed. See my cute little corner shelves. They used up that awkward space that was left.
It's been almost two years now and I still love my cottage kitchen and wooden counters. They have held up really well by the way! Counters were made with 1x6 pine boards which we painstakingly picked out so they were REALLY straight. We used 1x4's for the backs. Then I stained them and applied 6 coats of clear poly over them. The first photo is before a new frig and the wainscoting back-splash. The second is afterward.
Here is a look at the open shelves once they were done to match the new kitchen...(Hah, I just noticed I took this pic before I put the knob on the door. I remember that I had miscounted.)
On to the next project...
And, having only one bathroom is a problem at times so hubby and youngest son stole a little corner of the third bedroom and built me a half bath....LOVE IT!
And then...
Originally the door was a normal opening door but because the room is small it had to open out which was a problem since it opened into my hallway. Dislike! So I found a tutorial online and we made our own barn door out of the six panel door we originally purchased. $50 instead of $150! All hardware from Home Depot and an antique knob we switched out from the master bedroom closet. LOVE IT!

Right after we moved in we tore out the bedroom carpets and cleaned up the hardwood floors that were underneath. There was parquet tile in the hallway and we couldn't figure out why so we tore it up to discover water damaged hardwood near where the washer had originally gone in the kitchen. Another project. Replace the hardwood with plywood and run the tile from the kitchen partway into the hall. It turned out okay and I think it actually works fine. Anyway, two weeks and a very sore back later I had hand sanded stained and varnished three bedrooms, the hallway, living and dining rooms. Okay..hubs did help in the living/dining area by sanding and also by removing all the furniture from the rooms for me.
Before...
During,..the bridge we built so we could get to our bedroom to sleep...the trick was getting the dog to walk over the bridge...haha! The forefront of this next picture is actually the area that we had to replace the water damaged wood flooring...
After...
In the process of the major renovations above we have also blown insulation into the attic and added insulation to the crawl space, painted every wall and ceiling, switched ceiling fans around, replaced overhead lights, added trim to beef up the corner trim the folks before had on the ceiling/walls. I LOVE my little brick beach bungalow!
We still have some more projects but they will get done in good time. I'll be sure to add photos when we do. Thanks for stopping by and come again. I'll be updating soon!
Update: Windows have been ordered for the dining, kitchen, bathroom (not my glass block :-( but that's okay, it's glazed) and the last three for the other two bedrooms. Looking forward to having them and putting them in!
Bubba says Hey!